How to Clean Car Windows for Streak-Free Results

How to Clean Car Windows for Streak-Free Results
Introduction
Having clean and clear windows is essential for safe and enjoyable driving. However, cleaning car windows can be a challenging task, often leaving behind streaks and smudges that affect visibility. To achieve streak-free results and restore the clarity of your car’s windows, it’s important to follow the right techniques and use appropriate cleaning products. In this article, we will provide step-by-step instructions on how to clean car windows effectively, leaving them spotless and streak-free.
1. Gather the Necessary Tools and Materials
Before you begin cleaning your car windows, gather the following tools and materials:
- Glass cleaner: Choose a high-quality glass cleaner specifically formulated for automotive use.
- Microfiber cloths: These are ideal for cleaning glass as they are lint-free and gentle on the surface.
- Squeegee: An automotive squeegee with a rubber blade helps remove excess water and prevent streaks.
- Distilled water: Distilled water is free from minerals that can leave streaks and spots.
- Bucket: Fill a bucket with warm water to use for rinsing the windows.
- Soft-bristled brush or toothbrush: This is useful for cleaning hard-to-reach areas and removing debris.
2. Choose the Right Time and Location
Cleaning car windows is best done in a shaded area or during cloudy days. Direct sunlight can cause the cleaning solution to dry quickly, leaving streaks behind. Additionally, cleaning windows in hot weather can result in the cleaning solution evaporating too fast, making it difficult to achieve streak-free results. Choosing the right time and location ensures optimal conditions for a successful window cleaning session.
3. Remove Dust and Debris
Before applying any cleaning solution, remove loose dust and debris from the windows. Use a soft-bristled brush or toothbrush to gently sweep away any dirt or particles. Pay attention to the corners, edges, and window crevices, as these areas tend to accumulate more debris.
4. Prepare the Cleaning Solution
Fill a bucket with warm water and add the recommended amount of glass cleaner according to the product instructions. Alternatively, you can create a homemade cleaning solution by mixing equal parts of vinegar and distilled water. Vinegar is an effective natural cleaner that helps remove dirt and grime from windows.
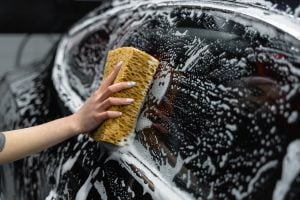
5. Clean the Exterior Windows
Follow these steps to clean the exterior windows of your car:
Step 5.1: Wet the Window
Dip a microfiber cloth into the cleaning solution and wring out any excess liquid. Start by wetting the exterior window surface thoroughly. Avoid applying the cleaning solution directly to the glass to prevent overspray on the car’s paintwork.
Step 5.2: Wipe the Window
Using the damp microfiber cloth, wipe the window in straight, overlapping motions. Start from the top and work your way down. Pay extra attention to areas with stubborn stains or grime, applying gentle pressure to remove them.
Step 5.3: Rinse the Window
Dip a clean microfiber cloth into the bucket of warm water and wring it out. Use the damp cloth to rinse the window, removing any remaining cleaning solution. This step is crucial for preventing streaks and residue.
Step 5.4: Dry the Window
Immediately after rinsing, use a squeegee with a rubber blade to remove excess water from the window. Start from the top and pull the squeegee down in a smooth motion. Wipe the blade with a clean microfiber cloth after each pass to prevent streaks. Finally, use a dry microfiber cloth to wipe any remaining moisture and ensure a streak-free finish.
6. Clean the Interior Windows
Cleaning the interior windows follows a similar process, with a few additional considerations:
Step 6.1: Protect the Dashboard and Upholstery
Before cleaning the interior windows, place a clean towel or cloth over the dashboard and other surfaces to protect them from any drips or splashes from the cleaning solution.
Step 6.2: Apply the Cleaning Solution
Spray a small amount of the glass cleaner onto a microfiber cloth or directly onto the cloth itself. Avoid spraying the cleaner directly onto the window to prevent overspray and damage to interior surfaces.
Step 6.3: Clean and Dry the Window
Using the damp microfiber cloth, clean the interior window in the same manner as the exterior window. Wipe the window in straight, overlapping motions, starting from the top and working your way down. Rinse the cloth in clean water as needed and wring it out to remove excess moisture. Finish by drying the window with a separate, dry microfiber cloth.
7. Pay Attention to Detail
To achieve truly streak-free results, pay attention to the following details:
- Clean the window edges and corners using a soft-bristled brush or toothbrush to remove any residue or dirt buildup.
- For stubborn stains or spots, apply a small amount of glass cleaner directly to a microfiber cloth and gently scrub the affected area.
- Ensure that all cleaning products and tools are clean and free from debris to prevent transferring dirt onto the windows.
Conclusion
Clean and clear car windows not only enhance visibility but also contribute to the overall appearance of your vehicle. By following these step-by-step instructions and using the right tools and cleaning products, you can achieve streak-free results and enjoy crystal-clear windows. Remember to choose the right time and location, remove dust and debris, prepare the cleaning solution, and clean both the exterior and interior windows with care. With regular window cleaning and maintenance, you can ensure optimal visibility and a more enjoyable driving experience.