How to Fix a Dented Car
How to Fix a Dented Car Like a Pro
Your car, a symbol of mobility and personal style, is a source of pride. However, that pride can take a hit when you discover an unsightly dent on its pristine surface. Whether it’s the result of an unfortunate encounter with a parking lot pole, a rogue shopping cart, or a hailstorm, car dents are a common and vexing issue. In this comprehensive guide, we’ll take you on a deep dive into the art of fixing a dented car, offering an abundance of detail and expert advice to ensure your vehicle looks as good as new.
Understanding the Complex World of Car Dents
Dents come in various shapes and sizes, each requiring a specific approach for repair. Let’s explore the different types of car dents:
1. Small Dings and Creases
These minor dents often originate in parking lots due to door dings or minor collisions. Typically, they don’t involve paint damage and can be relatively straightforward to fix.
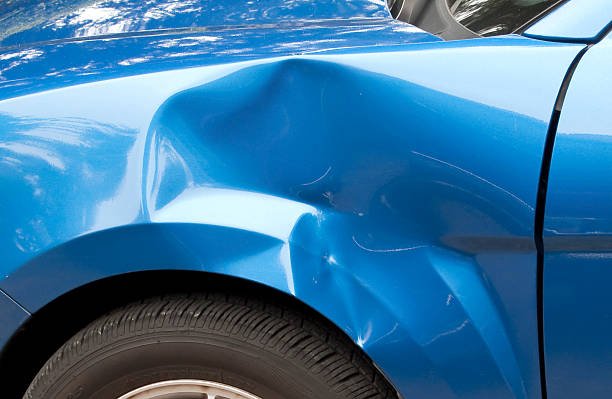
2. Large Dents
Large dents result from more substantial impacts, such as accidents or forceful collisions. Repairing these dents demands more effort and skill but is still achievable with the right techniques.
3. Hail Damage
Hailstorms can leave your car pockmarked with numerous small dents across the body. Although they may seem overwhelming in quantity, these dents are usually shallow and amenable to effective repair.
The Arsenal of Tools and Materials
To embark on your journey of car dent repair, assemble the following tools and materials:
Plunger or high-quality suction cup
Heat gun or hair dryer
Compressed air (for large dents)
Boiling water (for plastic bumpers)
Dry ice (for hail damage)
Rubber mallet
Auto body filler
Sandpaper in various grits
Body filler applicator
High-quality automotive primer
Paint matching your car’s color
Clear coat for added protection
Buffing compound
Polishing pads
Safety equipment (protective gloves and safety glasses)
Step-by-Step Guide to Car Dent Repair
Now, let’s delve into the detailed process of repairing car dents:
1. A Methodical Assessment
Begin your journey by meticulously inspecting the dent. Take note of its size, depth, and location. This assessment will be pivotal in determining the most suitable approach for repair.
2. The Art of Suction
For small dents and creases, your trusty plunger or suction cup comes into play. Moisten the suction cup, press it firmly onto the dent, and then give it a swift, strong pull. Repeat this process until the dent pops out. This technique is particularly effective for shallow and easily accessible dents.
3. Harness the Power of Heat
Larger dents require a more strategic approach known as the heat and cold method. Use a heat gun or hair dryer to warm the area around the dent for a few minutes. Once sufficiently heated, rapidly cool the area by spraying it with compressed air held upside down. The sudden change in temperature can cause the metal to contract, coaxing the dent to pop out.
4. Plastic Bumpers and Boiling Water
For plastic bumpers with dents, bring a pot of water to a boil and pour it over the affected area. With protective gloves, gently push the dent out from the inside. Exercise caution when using this method to prevent burns.
5. Hail Damage and Dry Ice
Hail damage is a common woe for car owners. To combat it, employ dry ice. Hold a piece of dry ice over each dent for approximately a minute, then rub it gently with a cloth. The rapid temperature change will encourage the dents to pop out.
6. The Gentle Tap of the Rubber Mallet
For particularly stubborn dents, call upon the aid of a rubber mallet. Gently tap the area from the inside, working your way around the edges of the dent. This method should coax the metal back into shape.
7. Filling and Sanding
Once you’ve achieved significant dent removal, it’s time to address any remaining imperfections. Apply auto body filler and let it dry. Then, using sandpaper of varying grits, meticulously sand the filler until it’s smooth and level with the surrounding surface.
8. The Art of Priming and Painting
After achieving a smooth surface, apply a high-quality automotive primer to the repaired area and allow it to dry thoroughly. Next, carefully apply paint that matches your car’s color. Finish the paintwork with a clear coat for added protection and shine.
9. The Final Shine: Buff and Polish
Once the paint has dried, the final touch is crucial. Use a buffing compound and polishing pads to blend the repair with the surrounding paint. This step ensures a flawless finish that makes your car look as good as new.
Expert Tips for a Successful Car Dent Repair
Here are some expert tips to enhance your chances of a successful dent repair:
1. Exercise Patience
Dent repair can be a time-consuming process, especially for larger or more complex dents. Take your time to ensure a high-quality repair job.
2. Prioritize Safety
Always wear appropriate safety equipment, including protective gloves and safety glasses, when working on your car. Be cautious when using heat sources and compressed air.
3. Know When to Seek Professional Help
If you’re uncertain about your skills or if the dent is extensive, don’t hesitate to consult a professional auto body shop. They possess the expertise and tools to handle complex repairs.
Conclusion: Your Car, Restored to Glory
Repairing a dented car is a satisfying and cost-effective DIY project that can help you maintain the beauty of your vehicle. With the right tools, materials, and techniques, you can restore your car’s exterior to its original splendor. Remember to assess the damage carefully and choose the repair method that aligns with the size and location of the dent.
For a treasure trove of detailed answers to common automotive questions and an extensive collection of DIY tips, explore our website dedicated to providing comprehensive guidance on a multitude of topics. We’re here to empower you with knowledge and skills to become an expert in all things automotive.