DIY Car Upholstery Cleaning

DIY Car Upholstery Cleaning
Introduction
Keeping your car clean and well-maintained is not only important for its appearance but also for your overall driving experience. One aspect of car maintenance that is often overlooked is upholstery cleaning. Over time, dirt, stains, and odors can accumulate on your car’s upholstery, making it look dull and unpleasant. Professional car upholstery cleaning services can be expensive, but you can save money by doing it yourself. In this article, we will guide you through a step-by-step process for DIY car upholstery cleaning, ensuring that your car’s interior looks fresh and smells great.
Gathering the Supplies
Before you start cleaning your car upholstery, it’s important to gather all the necessary supplies. Here’s a list of items you will need:
- Vacuum cleaner with upholstery attachment
- Soft-bristled brush or toothbrush
- Microfiber or cotton cloths
- Upholstery cleaner (check the label for compatibility with your car’s upholstery material)
- Stain remover (optional)
- Water
- Spray bottle
Make sure you have all these supplies ready before you begin the cleaning process.
Preparing the Upholstery
Before diving into the cleaning process, it’s essential to prepare your car’s upholstery. Follow these steps:
- Remove any large debris or loose dirt from the seats and floor mats by using a vacuum cleaner with the upholstery attachment. Ensure that you reach into crevices and corners where dirt may be hiding.
- Check for any stains or spots on the upholstery. If you notice any, apply a suitable stain remover according to the product instructions. Allow the stain remover to sit for a few minutes before proceeding.
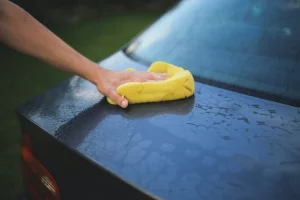
Cleaning the Upholstery
Now that you have prepared the upholstery, it’s time to start the cleaning process. Follow these steps:
- Dilute the upholstery cleaner according to the instructions on the bottle. It’s important to use the correct dilution ratio to avoid damaging the upholstery.
- Fill a spray bottle with the diluted upholstery cleaner. Spray a small amount onto a clean microfiber or cotton cloth. Always perform a spot test on a small, inconspicuous area of the upholstery to ensure it doesn’t cause any discoloration or damage.
- Gently blot the upholstery with the damp cloth, working in small sections. Avoid rubbing vigorously, as this can push the dirt deeper into the fabric.
- For stubborn stains, use a soft-bristled brush or toothbrush to agitate the cleaner gently. Be careful not to scrub too hard, as this can damage the upholstery fibers.
- Once you’ve cleaned a section, use a dry cloth to absorb any excess moisture and dirt. Repeat this process for the entire upholstery surface, working from one side of the car to the other.
- If necessary, refill the spray bottle with clean water and spray it onto a cloth to rinse off any remaining cleaner from the upholstery. Again, blot the upholstery with a dry cloth to remove excess moisture.
Cleaning Other Upholstery Components
In addition to the seats, there are other upholstery components in your car that require cleaning. Follow these steps to clean them effectively:
- Carpet: Vacuum the carpet thoroughly to remove loose dirt and debris. If there are any stains, apply a carpet cleaner suitable for automotive use. Follow the instructions on the cleaner and use a clean cloth or brush to gently work the cleaner into the carpet. Blot the area with a cloth to remove excess moisture and dirt.
- Headliner: Use a soft-bristled brush or a clean cloth to gently remove dust and dirt from the headliner. Be careful not to apply excessive pressure or use any cleaners that may damage the fabric. If there are any stains on the headliner, consult a professional for proper cleaning.
- Door Panels: Wipe down the door panels with a damp cloth to remove any dirt or grime. For stubborn stains, use a mild upholstery cleaner and a soft-bristled brush to gently scrub the affected areas. Wipe off any excess moisture with a dry cloth.
Drying and Finishing Touches
Once you’ve finished cleaning the upholstery and other components, it’s important to ensure they dry properly. Follow these steps to complete the process:
- Open the car doors or windows to allow air circulation, helping the upholstery dry faster.
- If possible, use a fan or a dehumidifier to expedite the drying process. Ensure that the interior of your car is well-ventilated to prevent the growth of mold or mildew.
- Once the upholstery is completely dry, use a soft-bristled brush to fluff up any fabric that may have been flattened during the cleaning process.
- Finally, enjoy your clean and fresh-smelling car interior!
Conclusion
Regularly cleaning your car’s upholstery not only keeps it looking great but also helps maintain its longevity. With the DIY car upholstery cleaning process outlined in this article, you can save money and achieve professional-level results. Remember to gather all the necessary supplies, prepare the upholstery, and follow the step-by-step cleaning instructions. By investing a little time and effort, you can enjoy a clean and comfortable driving experience every time you get behind the wheel.