Mastering the Art of Photography

Mastering the Art of Photography
Introduction
Photography is a beautiful and expressive art form that allows us to capture and preserve moments in time. Whether you’re a beginner or an experienced photographer, mastering the art of photography requires dedication, practice, and a solid understanding of the fundamental principles. In this comprehensive tutorial, we will guide you through the steps to help you become a master of photography.
1. Understanding Your Camera
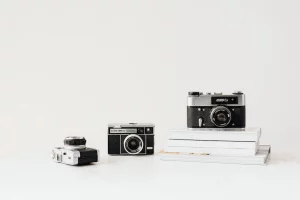
To begin your journey towards mastering photography, it’s essential to have a thorough understanding of your camera. Every camera is unique, so familiarize yourself with its features and functions. Read the user manual and experiment with different settings to get a feel for how they affect your photographs.
1.1 Camera Modes
Most cameras offer various shooting modes that can help you achieve different effects. Familiarize yourself with the following modes:
1.1.1 Auto Mode
Auto mode is perfect for beginners as it allows the camera to make all the decisions regarding exposure, focus, and other settings. However, it limits your creative control.
1.1.2 Aperture Priority Mode
In this mode (often denoted as “A” or “Av” on your camera’s mode dial), you control the aperture, and the camera adjusts the other settings accordingly. This mode is excellent for controlling depth of field.
1.1.3 Shutter Priority Mode
Shutter priority mode (often denoted as “S” or “Tv”) lets you control the shutter speed while the camera adjusts other settings. It’s ideal for capturing fast-moving subjects or creating motion blur.
1.1.4 Manual Mode
In manual mode, you have complete control over all the camera settings. This mode provides the most flexibility but requires a solid understanding of exposure and camera fundamentals.
1.2 Exposure Triangle
Understanding the exposure triangle is crucial for achieving properly exposed photographs. The three elements of the exposure triangle are:
1.2.1 Aperture
Aperture refers to the opening in the lens that controls the amount of light entering the camera. A wide aperture (represented by a smaller f-number) creates a shallow depth of field, while a narrow aperture (larger f-number) increases the depth of field.
1.2.2 Shutter Speed
Shutter speed determines the length of time the camera’s sensor is exposed to light. Fast shutter speeds freeze motion, while slow shutter speeds create motion blur. Experiment with different shutter speeds to capture the desired effect.
1.2.3 ISO
ISO measures the camera’s sensitivity to light. Lower ISO values produce cleaner images but require more light. Higher ISO values are useful in low-light situations but may introduce noise. Find the right balance for your desired shot.
2. Composition Techniques
Composition plays a crucial role in photography and can transform an ordinary scene into a captivating image. Here are some composition techniques to consider:
2.1 Rule of Thirds
The rule of thirds involves mentally dividing the frame into a 3×3 grid and placing your subject along the grid lines or at the intersection points. This technique adds balance and visual interest to your photographs.
2.2 Leading Lines
Leading lines are elements within a photograph that guide the viewer’s eyes towards the main subject. Use roads, fences, or other lines in the scene to create depth and draw attention to your subject.
2.3 Framing
Framing involves using elements within the scene to create a frame around your subject. This technique adds depth and draws the viewer’s attention to the main focal point.
2.4 Symmetry and Patterns
Symmetry and patterns can create visually striking images. Look for naturally occurring patterns or man-made structures that exhibit symmetry to add interest to your compositions.
3. Lighting Techniques
Lighting plays a crucial role in photography and can drastically affect the mood and quality of your images. Here are some essential lighting techniques to consider:
3.1 Golden Hour
The golden hour refers to the period shortly after sunrise or before sunset when the light is soft, warm, and diffused. Take advantage of this magical light to capture stunning landscapes and portraits.
3.2 Backlighting
Backlighting occurs when the main light source is behind your subject. This technique can create silhouettes or add a halo-like effect, adding depth and drama to your images.
3.3 Fill Flash
Fill flash involves using a flash unit to fill in the shadows and balance the exposure when the background is significantly brighter than the subject. It’s useful for outdoor portraits or when shooting in harsh lighting conditions.
3.4 Light Painting
Light painting is a creative technique that involves using a long exposure and a light source to paint or draw in the frame. Experiment with different light sources, colors, and movements to create unique and captivating images.
4. Post-Processing
Post-processing is the final step in the photography workflow and allows you to enhance and refine your images. Here are some popular post-processing techniques:
4.1 White Balance Adjustment
White balance ensures accurate color representation in your photographs. Adjust the white balance settings in post-processing to correct any color casts and achieve the desired look.
4.2 Exposure Adjustment
Fine-tune the exposure of your images by adjusting the brightness, contrast, highlights, and shadows. Be careful not to overexpose or underexpose your photos during the process.
4.3 Crop and Straighten
Use cropping and straightening tools to improve the composition and remove any distracting elements from your images. Ensure that your subject is properly aligned and centered, if desired.
4.4 Sharpening and Noise Reduction
Apply sharpening techniques to enhance the details in your images. Additionally, reduce noise in low-light or high ISO images to improve the overall quality.
Conclusion
Becoming a master of photography requires time, practice, and a willingness to learn and experiment. By understanding your camera, mastering composition techniques, utilizing different lighting methods, and refining your images through post-processing, you’ll be well on your way to capturing stunning photographs. Remember to keep exploring, be patient, and most importantly, enjoy the process of creating art through photography. Happy shooting!