How to Start a DIY Craft Project

How to Start a DIY Craft Project
Do you have a creative streak and love making things with your own hands? Starting a DIY craft project can be a rewarding and fulfilling experience. Whether you’re a beginner or an experienced crafter, this step-by-step guide will walk you through the process of starting your own DIY craft project.
Step 1: Choose Your Craft
The first step in starting a DIY craft project is to choose the type of craft you want to pursue. There are numerous options to consider, such as painting, knitting, crocheting, sewing, jewelry making, paper crafts, and many more. Think about your interests, skills, and the materials you have access to.
Once you’ve chosen your craft, research different techniques and projects within that craft. Browse through craft magazines, online platforms, and social media for inspiration. Create a collection of ideas and projects that appeal to you.
Step 2: Gather Your Supplies
Before diving into your DIY craft project, it’s essential to gather all the necessary supplies. Make a list of the materials and tools you’ll need based on the projects you’ve chosen. Visit your local craft store or search online to purchase the required supplies.
Here are some common supplies you might need for different crafts:
- Paints, brushes, and canvases for painting
- Yarn, knitting needles, and crochet hooks for knitting and crocheting
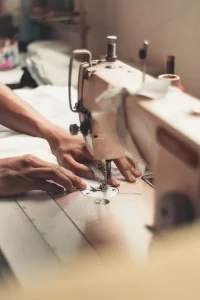
- Fabric, thread, and sewing machine for sewing
- Beads, wires, and pliers for jewelry making
- Paper, scissors, and glue for paper crafts
Ensure that you have all the necessary supplies before moving on to the next step. Having everything organized and within reach will make the crafting process much smoother.
Step 3: Set Up Your Workspace
Creating a dedicated workspace for your DIY craft project is crucial for staying organized and maximizing your productivity. Find a well-lit area in your home where you can comfortably work on your craft. Clear out any clutter and make sure you have enough space to spread out your materials.
Set up a table or desk to work on and gather any additional tools like scissors, rulers, or cutting mats that might be required for your specific craft. Consider investing in storage containers or organizers to keep your supplies neat and easily accessible.
Step 4: Learn and Practice Basic Techniques
Before diving into a specific project, take the time to learn and practice the basic techniques of your chosen craft. This will help you develop the necessary skills and gain confidence in your abilities.
Utilize online tutorials, books, or video courses to learn the fundamentals. Practice different stitches, brush strokes, or techniques until you feel comfortable with them. Building a strong foundation of skills will make it easier to tackle more complex projects in the future.
Step 5: Start with a Simple Project
When starting a DIY craft project, it’s advisable to begin with a simple and achievable project. This will give you a sense of accomplishment and motivate you to continue exploring the craft.
Choose a project from your collection of ideas that matches your skill level. Ensure that you have all the necessary materials and follow the instructions carefully. Take your time and enjoy the process. Remember, the goal is to learn and have fun!
Step 6: Join a Craft Community
One of the best ways to stay motivated and inspired in your DIY craft journey is to join a craft community. Look for local craft groups, workshops, or online communities where you can connect with fellow crafters.
Participating in a craft community provides an opportunity to share your projects, learn from others, and gain valuable feedback. It’s also a great way to discover new techniques, ideas, and sources of inspiration. Don’t hesitate to ask questions or seek advice from experienced crafters.
Step 7: Experiment and Explore
As you gain more experience and confidence in your chosen craft, don’t be afraid to experiment and explore new ideas. Step out of your comfort zone and try different techniques, materials, and projects.
Keep a notebook or a digital journal to jot down your ideas, inspirations, and sketches. This will help you stay organized and revisit your creative thoughts later. The more you explore, the more you’ll grow as a crafter.
Step 8: Share Your Creations
Finally, don’t forget to share your DIY craft creations with others. Whether it’s posting pictures on social media, gifting your handmade items to friends and family, or even selling them online or at craft fairs, sharing your work allows you to celebrate your accomplishments and inspire others.
Be proud of your creations and the effort you put into them. Embrace the feedback you receive and use it to improve your skills further. Remember, crafting is all about expressing your creativity and enjoying the process.
Conclusion
Starting a DIY craft project can be a fulfilling and enjoyable journey. By choosing a craft, gathering supplies, setting up your workspace, learning techniques, starting with simple projects, joining a craft community, experimenting, and sharing your creations, you’ll be well on your way to becoming a skilled crafter.
Remember, the most important thing is to have fun and express your creativity. Enjoy the process, learn from your experiences, and let your imagination guide you as you embark on your DIY craft adventures.